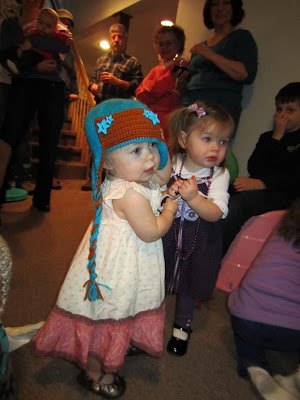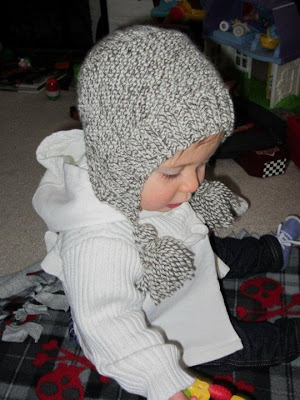


Fusion First Bomber Hat
You will need:
Size 8 double pointed needles
Size 7 circular 16 inch needles
Size G crochet hook
Yarn needle
2 skeins of medium worsted weight yarn (I used Vanna's Choice)
Stitch marker
At least 2 buttons
Sizes:
0-6 months
6-12 months
Toddler (ages 1-2 years)
Youth small (ages 3-5 years)
Earflaps (make 2 using size 8 dpn):
Cast on 3 stitches
Row 1 (and all odd rows): K1, mk1R, K to last stitch, mk1L, K1
Row 2 (and all even rows): K1, P to last sticth, K1
Repeat rows 1 & 2 until you have 15 (17, 21,23) stitches
End on a purl row
Switch to size 7 circular needles for the main hat:
Using a knitted cast on CO 9 (10, 12, 13), k across 15 (17, 21, 23) from the ear flap on dpn, CO 16 (18, 22, 26), k across 15 (17, 21, 23) from other ear flap, CO 9 (10, 12, 13). You should now have a total of 64 (72, 88, 98) stitches on the circular needles.
Join in the round, place marker, and taking care not to twist your stitches, knit in stockinette stitch for 8.5 (10, 11, 12.5) cm. If you'd like you can add a stripe after 3.5 cm. It doesn't even need to be jogless because the bomber flap will cover the seam. For the toddler size hat only: On the last row, K1, mk1R, k to last sticth, mk1L, K1. For the youth size hat only: On the last row, K1, k2tog, knit to 3rd to last stitch, k2tog, k1.
Decrease rows:
[K 6 (7, 8, 10), k2tog] for the entire row
Knit across
[K 5 (6, 7, 9), k2tog] for the entire row
Knit across
[K 4 (5, 6, 8), k2tog] for the entire row
Knit across
[K 3 (4, 5, 7), k2tog] for the entire row
Knit across
[K 2 (3, 4, 6), k2tog] for the entire row
Knit across
Continue with this pattern until the row in which you k2tog for the entire row.
Using a yarn needle, sew the remaining stitches together. Weave in any loose ends.
Using size G crochet hook, single crochet the trim of the hat starting at the point on the earflap.
Using size G crochet hook, single crochet across the 18 (20, 24, 26) stitches between earflaps on the side with the stitch marker. Single crochet rows back and forth until the flap measures 7 (8.5, 9.5, 11) cm.
Sew flap to hat by attaching buttons in each of the upper corners.
For braids:
Cut 12 pieces of yarn of each color 65 cm each. Sew 6 pieces of each color through the ends of the earflaps (each strand will be folded in half with the middle at the earflap). Divide the yarn into 3 sections. Each section should have 2 strands of each color. Braid the 3 sections. When you get to the bottom, tie the braid with a knot and wrap the yarn around a few times. Triple knot and then use your crochet hook to pull the yarn from the knot behind the binding and in with the tassle left at the bottom of the braid. Trim the ends of the braids with scissors.
Copywrite Material: This pattern may be used to make gifts or donations but you cannot sell items made from this pattern. You cannot sell this pattern. This pattern cannot be reproduced, rewritten, or reposted anywhere. Feel free to link to this pattern if you would like to share it. Happy knitting!
Copywrite Material: This pattern may be used to make gifts or donations but you cannot sell items made from this pattern. You cannot sell this pattern. This pattern cannot be reproduced, rewritten, or reposted anywhere. Feel free to link to this pattern if you would like to share it. Happy knitting!


